
Setting Up Your Dashboard
1
Add tags to checks and monitors
Add relevant tags to all the checks and monitors that you’d like to display on your dashboard.
2
Create Dashboard
Create a new dashboard and configure basic settings.
3
Apply tag filters
Add tags to your dashboard to specify which checks to show.
4
Customize appearance (optional)
Customize your dashboard’s look and feel using custom CSS rules.
5
Set up a custom domain (optional)
Optionally configure a custom domain for professional branding.
6
Share the URL
Once your dashboard is ready, you can share it with anyone using its URL.
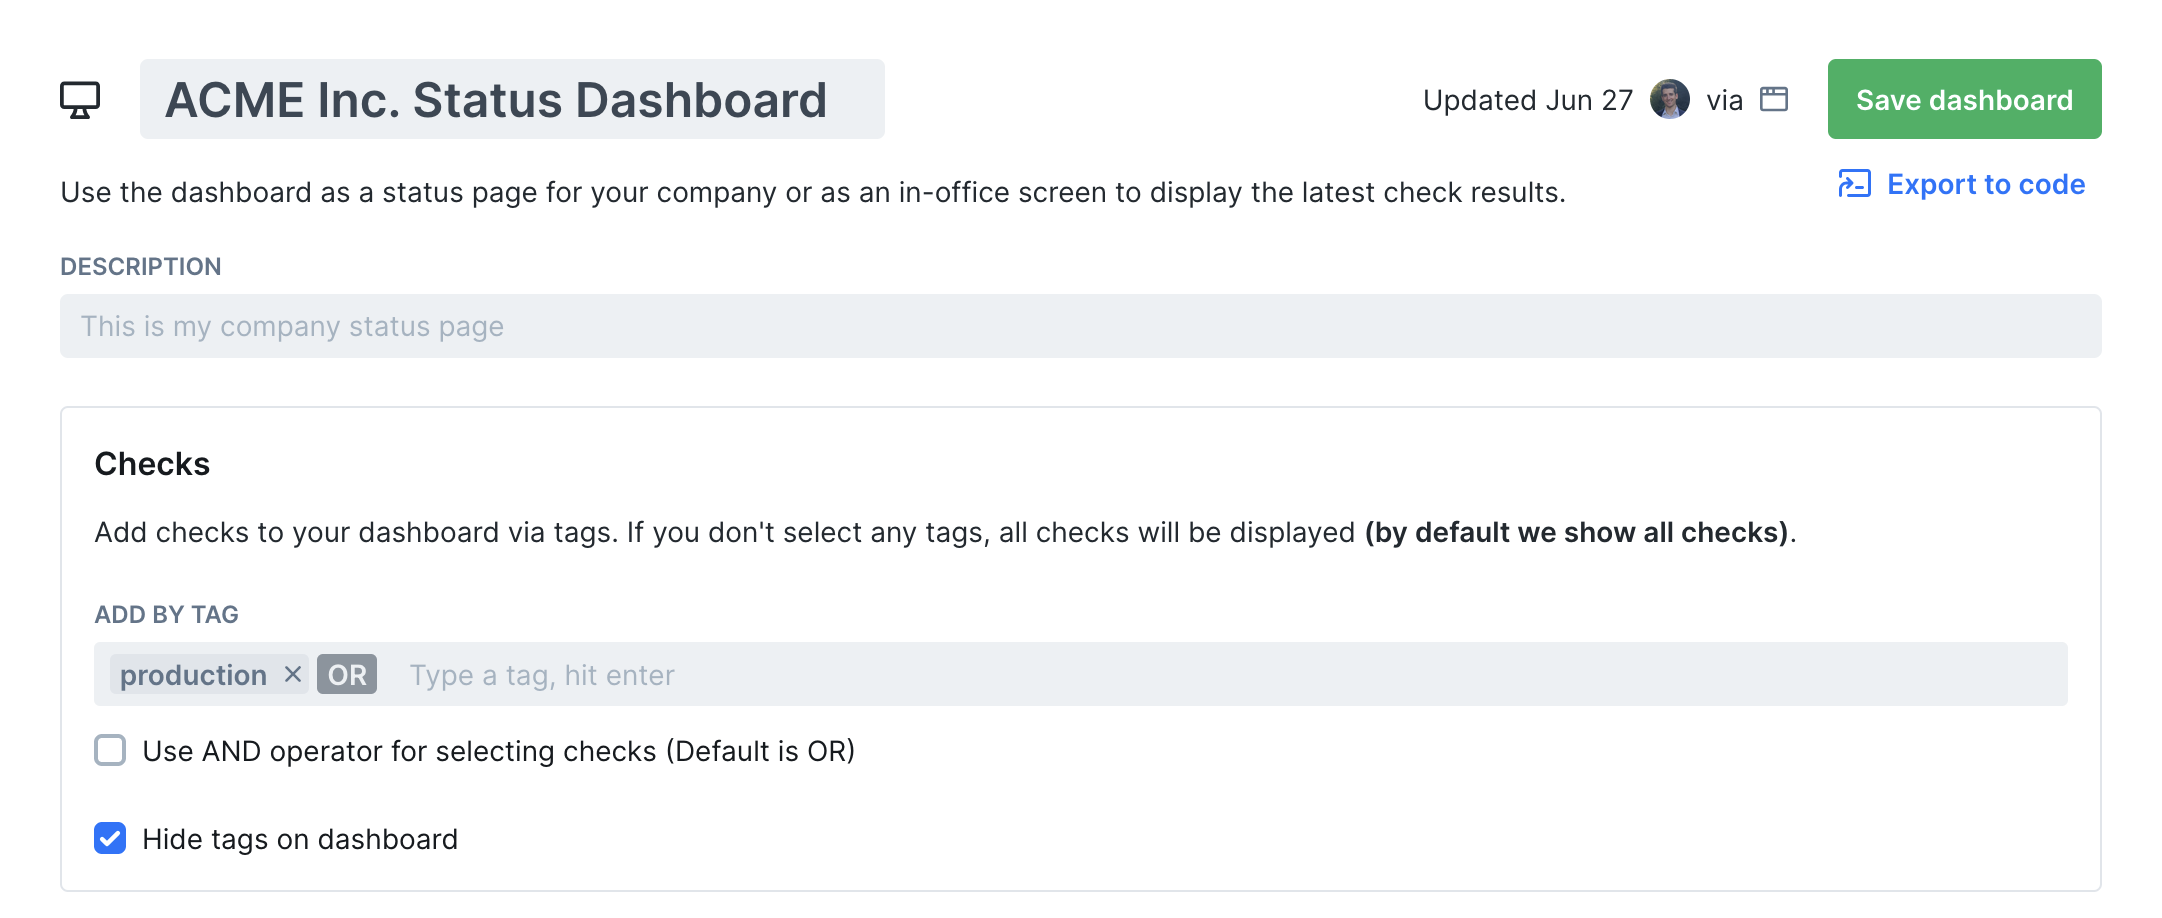
Basic Settings
- Title: Add a title like “ACME status dash”. This is separate from your Checkly URL or custom domain.
- Description: Add a clarifying text to explain to visitors what they are looking at.
- Checks: Specify the tags of the checks you want to show on the dashboard. By default we show all checks. You can also choose to hide the tags from the dashboard.
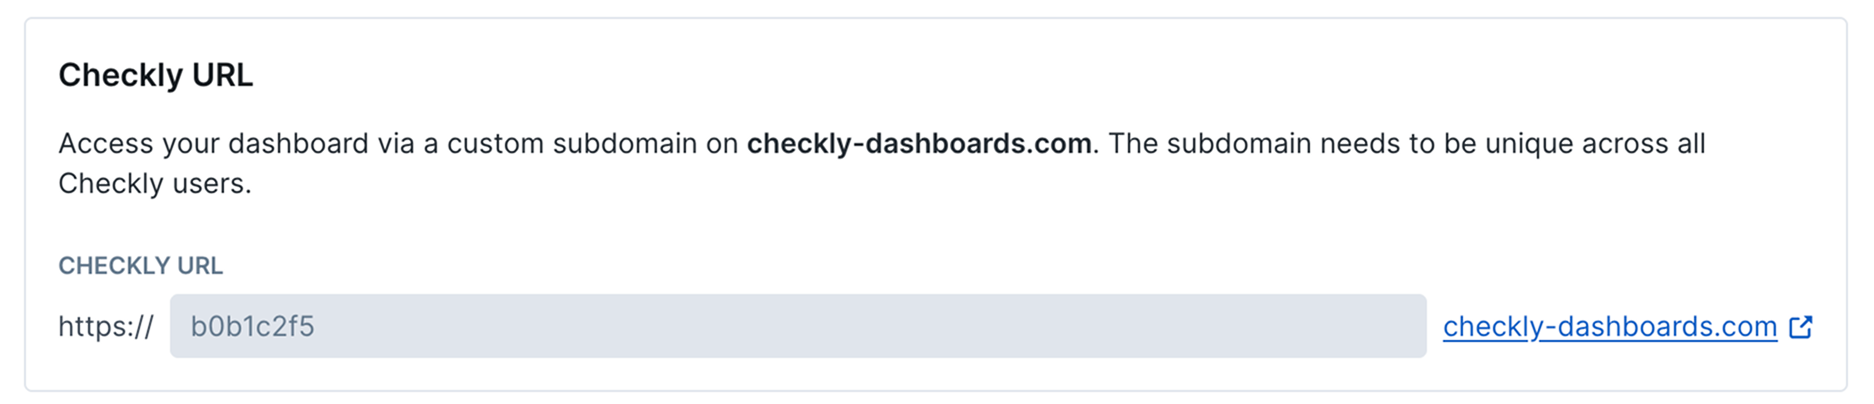
Checkly URL
Every dashboard comes with a configurable custom subdomain under thecheckly-dashboards.com domain. By default,
we generate a random ID. You can change this subdomain to anything you like as long as it is unique among all Checkly users.
Typically, a company name works best, e.g. acme.checkly-dashboards.com

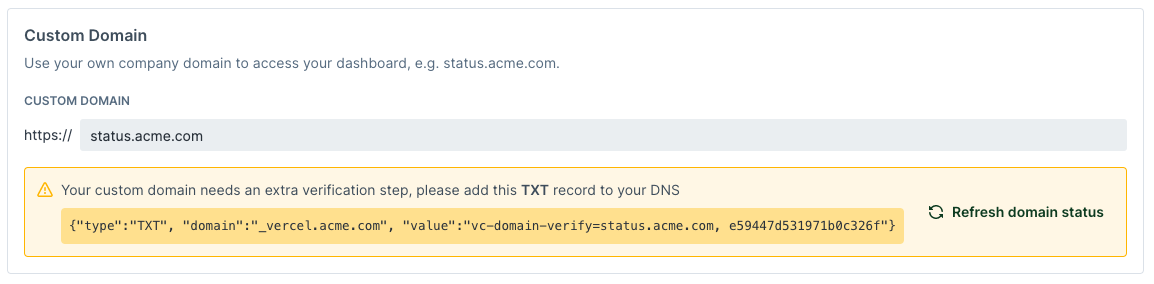
Custom Domain
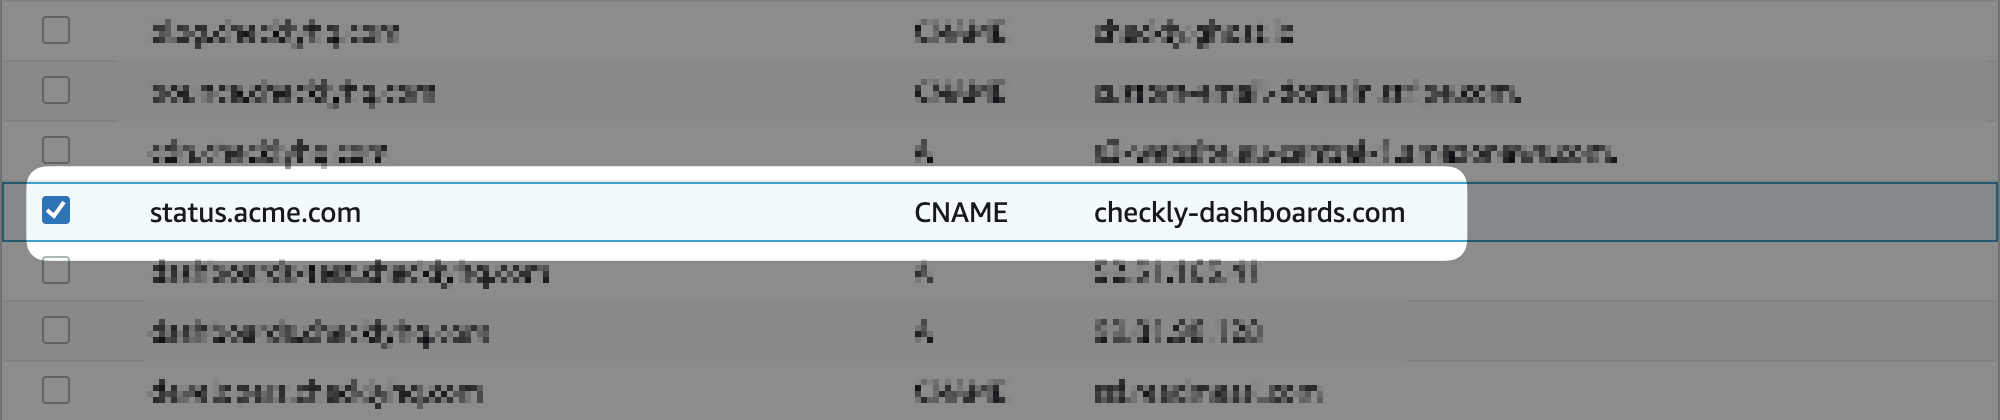
You can host your dashboard under your own domain. To make this work, you need to do two things:- Add a valid custom domain to your dashboard setting.


- Create a CNAME record in your DNS that points to checkly-dashboards.com
TXT record to
your DNS. You will see a notice similar to the one below.
Access Control
By default, Checkly dashboards are public and visible to anyone who knows the URL. You can set a dashboard to private, limiting access to users with a password or Checkly account.Enabling Authentication
Private dashboards are only available on certain plans. For more details, see our Pricing page.
- Navigate to the settings of the dashboard you wish to modify.
- Toggle on the “Password Protection” setting.
- Click “Save” to apply the changes.
- Next, the “Generate Password” button will appear, click this. It will open a modal which shows you your new private dashboard password.
Be careful, this is the only time you will see this password in plaintext. We do not store the password in plaintext, so if it is ever lost, you will need to regenerate a new one and inform any users of the new credentials.
Accessing Private Dashboards
After enabling password protection for your dashboard, you can continue to visit it via any custom domain you may have enabled, as well as the defaulthttps://[dashboardId].checkly-dashboards.com domain. The password authentication will work via both channels.
Checkly account login is only available to Enterprise customers.
https://[dashboardId].checkly-dashboards.com domain, you can also select “Login with Checkly” and sign in with your existing Checkly account via any of the supported methods (i.e. Google, Github, Username and Password). This is an Enterprise-only feature.
Look and Feel
- Logo: Display your company logo (or any image) on the top left side of your dashboard.
- Logo link: Add a clickable destination URL for your logo. When visitors click the logo, they’ll be redirected to your specified website (typically your company homepage).
- Favicon: Set a custom favicon for browser tabs and bookmarks.
- Auto paginate: Automatically switch between dashboard pages when you have multiple pages of checks.
- Auto refresh: Set how often the dashboard refreshes—choose between 1, 5, or 10 minutes.
- Show header: Toggle visibility of the dashboard’s title and description.
- Show check run links: Adds a clickable link to each check result so team members can inspect them. Off by default.
- Show and hide P-stats: Toggle the visibility of the performance stats for all checks on the dashboard.